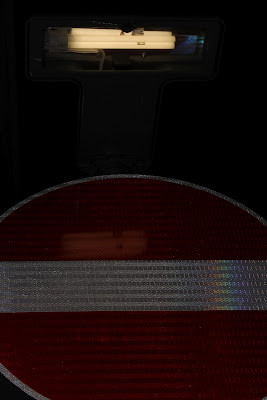
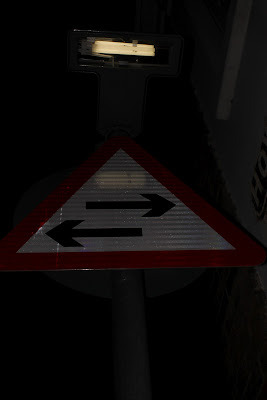
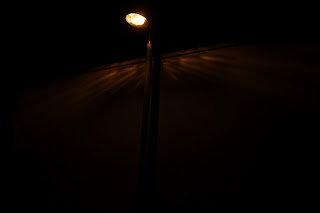
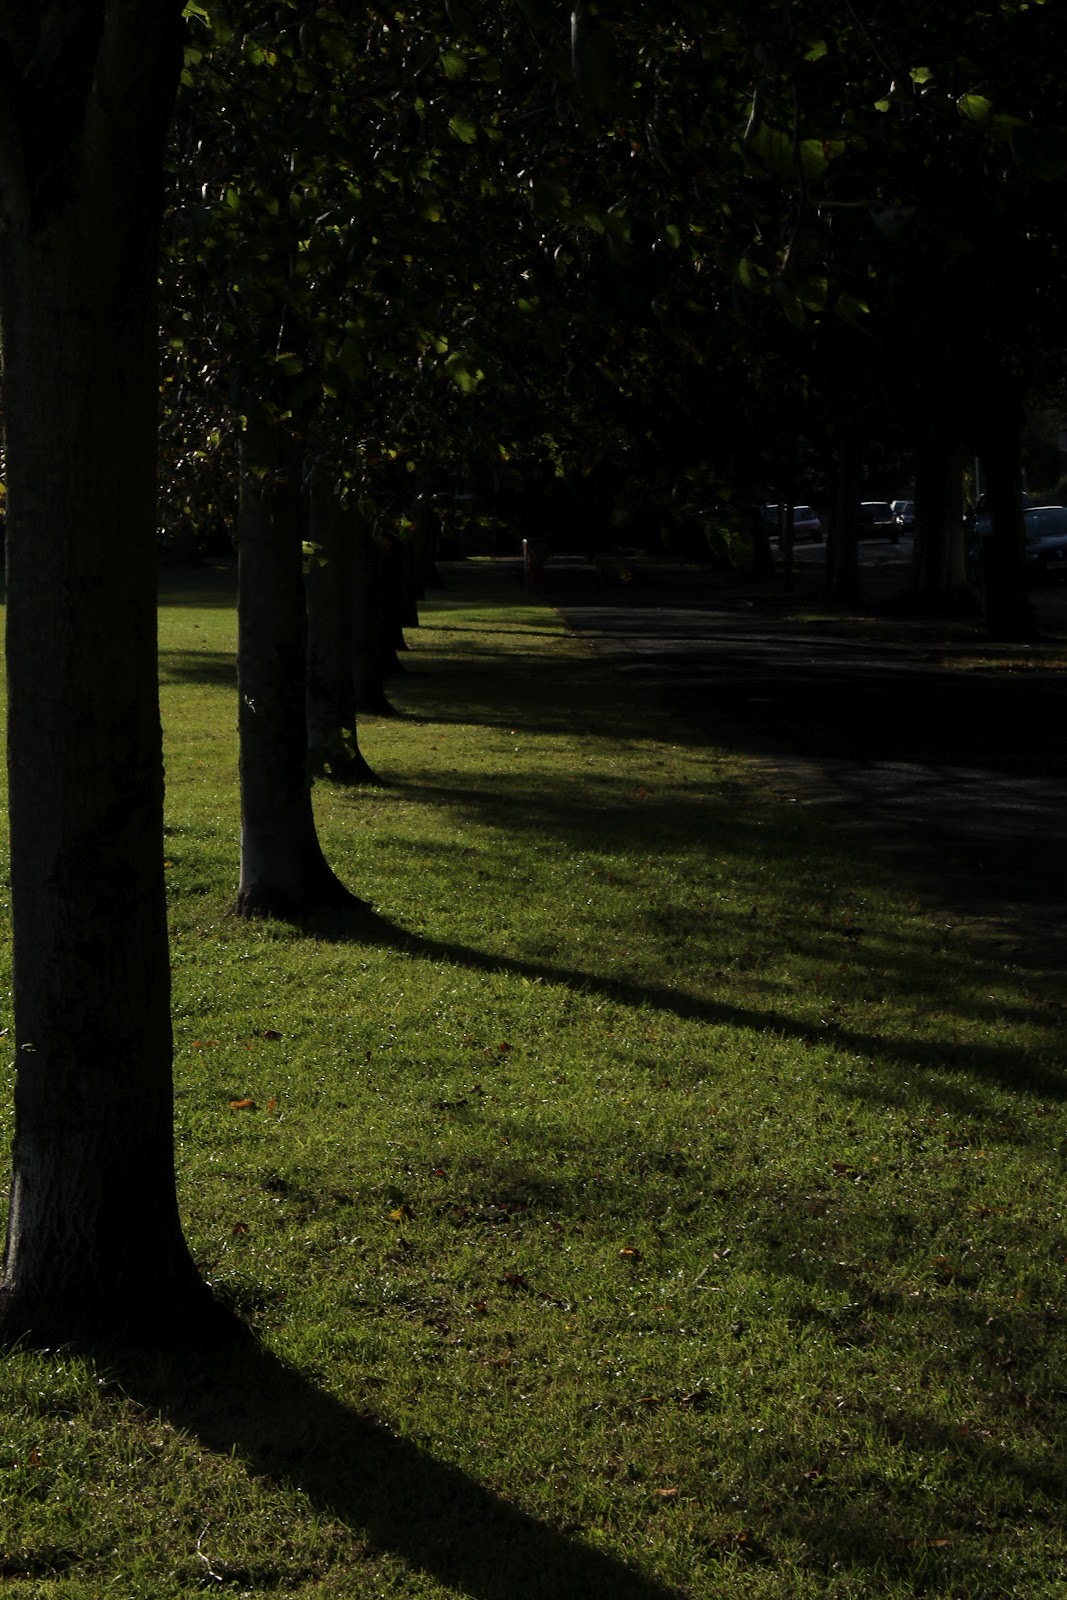
These are my final three images for 'Illuminance' :
Showing posts with label Illuminance. Show all posts
Tuesday, 9 October 2012
Third Shoot
For my third and final shoot, I wanted to try and investigate and experiment with shooting Low Key Lighting images. For this shoot, I wanted to go around the streets that I live in and try to find some street tungsten lights showing up signs and directions or even just typical lampposts. The reason why I wanted to change my ideas from the theme shadows, is because I wanted to show my versatility of style of being able to photograph different sorts of lighting's. I also want to show that I have thought about what different objects and lighting's that I could make different for my final three images. Because I wanted to shoot my photo shoot on the location of public streets, I really wanted to find signs or tungsten's that didn't have a building or anything that would make my photos look busy or confusing. However if there is a building that shows amazing light structure form a tungsten or lamppost this would be okay because this would give me a great final image due to me looking around and exploring objects that wouldn't seem interesting in person, but when photographed it looks magnificent and amazing to the eye.
Because I wanted to shoot Low Key Lighting, I had to change my camera settings from Hard Lighting, because this will allow too much light entering the lens to make the effect of the lights not as effective as in Low Key Lighting could be. So to make my photo look more effective on it's outcome, I had to keep trying to under-expose my images by two F stops or by as much as I could to get the best outcome I could get. For my first shot in this photo shoot, I used the settings of ISO 100, Shutter Speed 1/125 and Aperture F 14. From this I wasn't really sure if that was the outcome that I wanted to achieve so I became more experimental and started to fiddle around with my settings more to get a better understanding of how a Low Key Lighting image should look like and how I could get the best shot that I could possibly achieve.
This is my contact sheet for my third photo shoot:
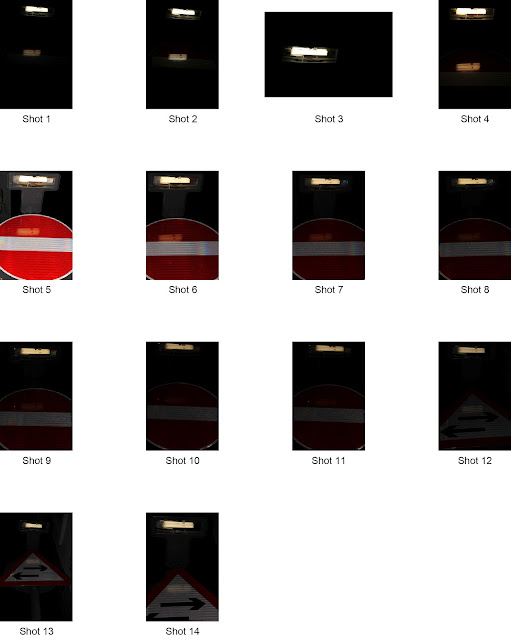
When I went out to start to take this shoot for my third and final shoot for 'Illuminance', I had to be careful whether I wanted to take an image of a lamppost or signs next to a household. This is because the people who are living there might not be 100 per cent certain on what you are doing and they might become suspicious. So before I started to raise concern, I only used flash a couple of times just to experiment but the best thing is not to use it at all before all the attention was on me. When I had thought through what to do and what not to do, then I began shooting my shoot. Firstly I started off by photographing signs and direction signs, which had tungsten lights which shows people what they are. So I went through photographing these signs around where I live, but the outcomes that I was wishing for weren't what I was expecting. However I kept on trying to succeed, but in the end the images weren't as powerful and effective as I wanted them to be.
These images that I have chosen to show from this shoot can show that the composition of myself and of the signs/directions, are not brilliant. So due to this I tried changing the angle and settings of my images but I did not succeed. Overall I really didn't want to use any of those images as one of my final images, because they don't look as professional enough and doesn't fit my theme as much as I would like them to.
Here are a couple of examples of my first shoot:
I did use flash a couple of times, just to see what the outcome would have been and how I could compare flash images and non-flash images. So between these two images below, you can see that when photographing with flash, the image is not very detailed at all and all you can see if very hard lighting in this image other than Low Key Lighting. With using flash to do Low Key Lighting, it really doesn't work because the flash brings all the imperfections arise very strongly as can be shown in this image. With the image without flash, you can tell that no flash has been used due to the very slight glow on the tungsten light and the glowing orangy colour, that gives of a warm, soft feeling. The image I used flash for, I did this because I wanted to just see what the outcome would turn out as and now I would now know how to compare images that have used flash and ones without flash.
I can now compare flash and non-flash between my images, by the way that you can see the images that I have used the flash, the image is very detailed but the lighting is Hard Lighting not Low Key Lighting that i want for my overall image. You can also see that the flash brings out the object's imperfections and this can make the image look ugly and not thought about when captured. However with the image without flash, you can see only the slight reflection of light which is reflecting from the light source onto the sign. This shows very good low lighting because without seeing the image with the flash, you would not know what the object is that the light is reflecting onto. You can also see that you can not see any imperfections in this image and only small detail which is hardly visible.
Once I had reviewed my previous images of the signs I knew that they were not as professional as I wanted them to be so I set off on another shoot still focusing on street lights, preferably lampposts. So when I went out focusing on lampposts, I wanted to get some great effects and outcomes from this shoot. I was also focusing on what effects that I did want, like big eccentric lighting effects or even just small impressive effects that people don't really notice of. So to do this, I walked around my neighborhood like I did on my first shoot with the lights and signs, and I can across this lamppost that was right next to a house, but the guttering was blocking some of the light passing down onto the pavement and the effects of the light looked like the lamppost had wings of light.
This is my contact sheet of this shoot:
During this shoot, I had to change my settings to make the effect of the lighting become more seen and effective. When shooting my last shoot on signs, I had to have my settings so that my images would look very Low Key to try and make the effect of reflecting light onto the object more seen and appreciated. However in this shoot I tried using the a different aperture to start off with to see if it would make the lighting effects more eye opening.
With my first image that I had shot, I used the settings 1/125 Shutter Speed, F 22 Aperture and 100 ISO. However with this image, you cannot see any detail within the light effects at all and I could see that the aperture was too big to make the image that I wanted to achieve. So from here I changed my Aperture dramatically from F 22 to F 5.6 to see if any change would make a difference, and it did! With my third shot, you can notice that the effects of the light are more visible and from this I now had an idea of what sort of Aperture I needed to investigate around to get my final image. During this shoot and my contact sheet, it showed that I was zooming in, changing directions and experimenting with different angles to try and see which is the best way to go to create my best and final image.
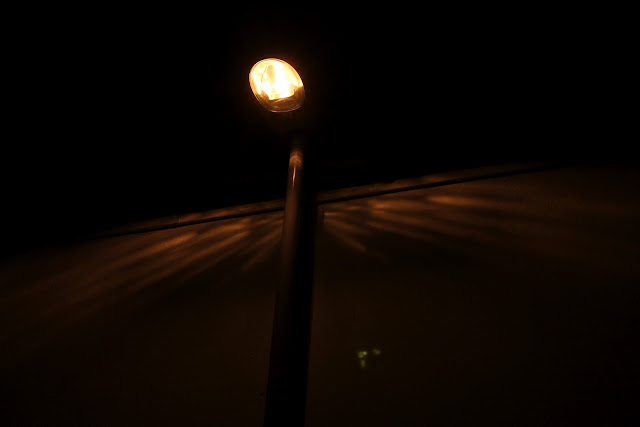
This is my final image for this final shoot and I am very proud of this outcome that I have been managed to produce. The reason why I chose this image for my final outcome is because the composition of the image is very predicted for an lighting image like this. This is because the angle that I positioned myself to produce this image is from a 45 degree angle to make the image look a bit more unique but I also wanted to make my image look very simple but very detailed when you really focus onto the effects on the wall. The reason why I said that my final image would partly look predictable is due to thinking that I would take an image like this, but I like the way that my image is clear on the lighting effects, because if it was hard to focus into the detail of the lighting effects of the lamppost, the image would not be as effective as I would have wanted it to be.
The settings for my final image were Shutter Speed 1/125, Aperture F 5.6 and ISO 100. I stayed with the aperture F 5.6 because I felt that when looking through my previous images before my final, the warmth of the colours and the Low Key lighting were as perfect as I was going to get them, because I thought that if I went any darker the Low key Lighting would be hiding all the detail away from the effects of the reflected light. One part of the image that I would change for the future is that I have a lens flare in my image but I feel that from this it creates a real look into taking images and shows that I haven't tried to edit out any imperfections or anything. I feel that sometimes images need imperfections to show that you could do better in the future and you can learn form your mistakes.
The colours in this image makes the image look very warm and comforting when you first come across it, and this is what I wanted to achieve because I wanted to make my image approachable but in the same way mysterious and gloomy, due to the Low Key lighting.
This is my final image for my Third Photo Shoot:
Because I wanted to shoot Low Key Lighting, I had to change my camera settings from Hard Lighting, because this will allow too much light entering the lens to make the effect of the lights not as effective as in Low Key Lighting could be. So to make my photo look more effective on it's outcome, I had to keep trying to under-expose my images by two F stops or by as much as I could to get the best outcome I could get. For my first shot in this photo shoot, I used the settings of ISO 100, Shutter Speed 1/125 and Aperture F 14. From this I wasn't really sure if that was the outcome that I wanted to achieve so I became more experimental and started to fiddle around with my settings more to get a better understanding of how a Low Key Lighting image should look like and how I could get the best shot that I could possibly achieve.
This is my contact sheet for my third photo shoot:
When I went out to start to take this shoot for my third and final shoot for 'Illuminance', I had to be careful whether I wanted to take an image of a lamppost or signs next to a household. This is because the people who are living there might not be 100 per cent certain on what you are doing and they might become suspicious. So before I started to raise concern, I only used flash a couple of times just to experiment but the best thing is not to use it at all before all the attention was on me. When I had thought through what to do and what not to do, then I began shooting my shoot. Firstly I started off by photographing signs and direction signs, which had tungsten lights which shows people what they are. So I went through photographing these signs around where I live, but the outcomes that I was wishing for weren't what I was expecting. However I kept on trying to succeed, but in the end the images weren't as powerful and effective as I wanted them to be.
These images that I have chosen to show from this shoot can show that the composition of myself and of the signs/directions, are not brilliant. So due to this I tried changing the angle and settings of my images but I did not succeed. Overall I really didn't want to use any of those images as one of my final images, because they don't look as professional enough and doesn't fit my theme as much as I would like them to.
Here are a couple of examples of my first shoot:
| Shot 1 |
| Shot 7 |
| Shot 13 |
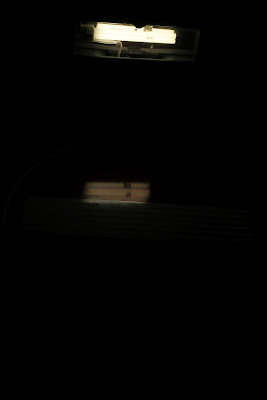
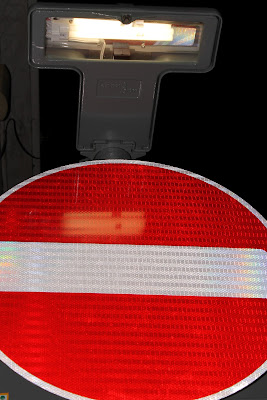
I did use flash a couple of times, just to see what the outcome would have been and how I could compare flash images and non-flash images. So between these two images below, you can see that when photographing with flash, the image is not very detailed at all and all you can see if very hard lighting in this image other than Low Key Lighting. With using flash to do Low Key Lighting, it really doesn't work because the flash brings all the imperfections arise very strongly as can be shown in this image. With the image without flash, you can tell that no flash has been used due to the very slight glow on the tungsten light and the glowing orangy colour, that gives of a warm, soft feeling. The image I used flash for, I did this because I wanted to just see what the outcome would turn out as and now I would now know how to compare images that have used flash and ones without flash.
I can now compare flash and non-flash between my images, by the way that you can see the images that I have used the flash, the image is very detailed but the lighting is Hard Lighting not Low Key Lighting that i want for my overall image. You can also see that the flash brings out the object's imperfections and this can make the image look ugly and not thought about when captured. However with the image without flash, you can see only the slight reflection of light which is reflecting from the light source onto the sign. This shows very good low lighting because without seeing the image with the flash, you would not know what the object is that the light is reflecting onto. You can also see that you can not see any imperfections in this image and only small detail which is hardly visible.
| With Flash ( Shot 5 ) |
| Without Flash ( Shot 1 ) |
Once I had reviewed my previous images of the signs I knew that they were not as professional as I wanted them to be so I set off on another shoot still focusing on street lights, preferably lampposts. So when I went out focusing on lampposts, I wanted to get some great effects and outcomes from this shoot. I was also focusing on what effects that I did want, like big eccentric lighting effects or even just small impressive effects that people don't really notice of. So to do this, I walked around my neighborhood like I did on my first shoot with the lights and signs, and I can across this lamppost that was right next to a house, but the guttering was blocking some of the light passing down onto the pavement and the effects of the light looked like the lamppost had wings of light.
This is my contact sheet of this shoot:
During this shoot, I had to change my settings to make the effect of the lighting become more seen and effective. When shooting my last shoot on signs, I had to have my settings so that my images would look very Low Key to try and make the effect of reflecting light onto the object more seen and appreciated. However in this shoot I tried using the a different aperture to start off with to see if it would make the lighting effects more eye opening.
With my first image that I had shot, I used the settings 1/125 Shutter Speed, F 22 Aperture and 100 ISO. However with this image, you cannot see any detail within the light effects at all and I could see that the aperture was too big to make the image that I wanted to achieve. So from here I changed my Aperture dramatically from F 22 to F 5.6 to see if any change would make a difference, and it did! With my third shot, you can notice that the effects of the light are more visible and from this I now had an idea of what sort of Aperture I needed to investigate around to get my final image. During this shoot and my contact sheet, it showed that I was zooming in, changing directions and experimenting with different angles to try and see which is the best way to go to create my best and final image.
| Shot 1 |
| Shot 3 |
This is my final image for this final shoot and I am very proud of this outcome that I have been managed to produce. The reason why I chose this image for my final outcome is because the composition of the image is very predicted for an lighting image like this. This is because the angle that I positioned myself to produce this image is from a 45 degree angle to make the image look a bit more unique but I also wanted to make my image look very simple but very detailed when you really focus onto the effects on the wall. The reason why I said that my final image would partly look predictable is due to thinking that I would take an image like this, but I like the way that my image is clear on the lighting effects, because if it was hard to focus into the detail of the lighting effects of the lamppost, the image would not be as effective as I would have wanted it to be.
The settings for my final image were Shutter Speed 1/125, Aperture F 5.6 and ISO 100. I stayed with the aperture F 5.6 because I felt that when looking through my previous images before my final, the warmth of the colours and the Low Key lighting were as perfect as I was going to get them, because I thought that if I went any darker the Low key Lighting would be hiding all the detail away from the effects of the reflected light. One part of the image that I would change for the future is that I have a lens flare in my image but I feel that from this it creates a real look into taking images and shows that I haven't tried to edit out any imperfections or anything. I feel that sometimes images need imperfections to show that you could do better in the future and you can learn form your mistakes.
The colours in this image makes the image look very warm and comforting when you first come across it, and this is what I wanted to achieve because I wanted to make my image approachable but in the same way mysterious and gloomy, due to the Low Key lighting.
This is my final image for my Third Photo Shoot:
| Final Image |
Tuesday, 2 October 2012
Second Shoot
For my second shoot I wanted to focus on playing with light in a different way that Hard and Soft lighting , but mostly focusing on how light casts shadows off of objects and how the shadows trail of in different directions and angles. I also wanted to focus on using Mid Key lighting where i wanted to create a warm and soft mood but I wanted desperately wanted to bring a bit of mysterious feelings which can be brought from the darkness that will portray from my image. For the location of my image for my second photo shoot, I wanted to be located within a park, so that it would be able to me a lot of green and grey colours. Green and grey together for me creates a very gloomy and mysterious feel, but by having the sun reflecting onto objects or an object will create a very happy and calm feeling. For the settings for this shoot, I needed to make sure that the image wasn't over-exposed or under-exposed, so the way that I wouldn't get this is by experimenting around with the settings. For my first shot I used the settings of 1/ 125 Shutter Speed, F 18 Aperture and ISO 100, so from this I knew that I had to keep playing around with my settings to get the great Mid Key settings I possibly could get.
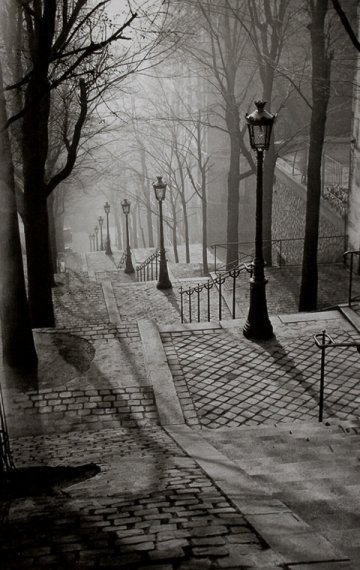
My inspiration to do a photographing the idea of shadows was Brassai, because his images were all very inspiring,one example of his work that got me to do the idea of shadows and this picture is from a whole variety in one of his pictures called 'Paris By Night'. I like this image because the image has the same Mid Key lighting as I was wishing to create within my test images and I like the way that the contrast between the black and the white really does create the feeling of happiness but you can also feel the mysterious and gloomy feeling. This image also makes your eye attracted to it because the way that the shadows of the objects are reflecting in the same way as the other objects it creates an illusion of shapes and angles.
When I went out to start shooting my second photo shoot, I had to be very careful due to all the children running around, this can be shown in a couple of my test images. This was because I had to respect parental views and try and find somewhere else to photograph that had great lighting and shadows structure. When I found the location where there was great shadows curling around some trees and proceeding onto the pathway. I knew that this was the spot whereabouts my shoot will begin. At first when capturing my images, they were coming out out too over-exposed and this shows the image is too dark and makes it Low Key. From viewing these first images, I then dramatically changed my aperture up two F stops, but now the images were coming out too under-exposed. The way that I can tell that my images are either under or over exposed, is by the distance between the High Key lighting and the Low Key lighting which can be seen going from the trees on the left to the right to the path.
Here are a couple of examples of my over-exposed and under-exposed images:
Here is my contact sheet to show my experimenting and investigating through this shoot :
Shooting this photo shoot, I kept on changing my position so that I would have a huge variety of images to show my progression through my shoot and also showing how I investigated with different heights and different angles to succeed and get my final image. I wanted to make sure that through my images you could see quite clearly the shadows protruding onto the path and disappearing into the darkness. This is where it will show my determination to make the image Mid Key and get the best image that I possibly could get. During this shoot, there were many advantages and disadvantages when shooting a photo shoot in a park. One advantage was that there was a good composition of trees on the left hand side where the sun was hitting the trees and this was making the shadows and creating a more interesting image. One disadvantage is that with all the shadows from the trees from the left, there was also other shadows reflecting over some of the shadows that were protruding onto the pathway. Due to this it was slightly annoying because there was no way that I could possibly change this or get rid of them out of my frame. However from this obstacle, I could change this for future planning by noticing the problem at the beginning of the shoot and this wouldn't affect me in the long run.
Here is an example of the other shadows reflecting into the shadows of the trees:
Throughout my whole of my images, I have chosen this image because I find that the composition of this image is very precise and all the shadows that have been protruded from the trees can bee seen heading into the path of darkness. I also chose to have this image as my final image because I have been able to capture the right lighting which was Mid Key lighting and I am very proud to say that I have succeeded photographing with shadows and the way that I have been able to capture the right settings to produce the right Mid Key lighting and still have the colours really complimenting each really well. The settings For my final image were shutter speed 1/ 125, aperture F 14 and ISO 100.
If I could do this photo shoot again, I would choose to do it in a place that was less busy and where it had less objects that could catch shadows that would ruin my shot for my overall final image. I would also choose to wait until the sun was further down in the sky, so that the picture would look slightly warmer to the eye and not so harsh. But overall I think that this photo shoot has been successful and that I am happy to put this image in as one of my final images for 'Illuminance'. I feel like this because i like that way that I have taken inspiration and similar style of Brassai's ' Paris By Night' image. I think about this in the sense that the series of shadows are the same and in a repetition with each others' trees shadows.
My inspiration to do a photographing the idea of shadows was Brassai, because his images were all very inspiring,one example of his work that got me to do the idea of shadows and this picture is from a whole variety in one of his pictures called 'Paris By Night'. I like this image because the image has the same Mid Key lighting as I was wishing to create within my test images and I like the way that the contrast between the black and the white really does create the feeling of happiness but you can also feel the mysterious and gloomy feeling. This image also makes your eye attracted to it because the way that the shadows of the objects are reflecting in the same way as the other objects it creates an illusion of shapes and angles.
When I went out to start shooting my second photo shoot, I had to be very careful due to all the children running around, this can be shown in a couple of my test images. This was because I had to respect parental views and try and find somewhere else to photograph that had great lighting and shadows structure. When I found the location where there was great shadows curling around some trees and proceeding onto the pathway. I knew that this was the spot whereabouts my shoot will begin. At first when capturing my images, they were coming out out too over-exposed and this shows the image is too dark and makes it Low Key. From viewing these first images, I then dramatically changed my aperture up two F stops, but now the images were coming out too under-exposed. The way that I can tell that my images are either under or over exposed, is by the distance between the High Key lighting and the Low Key lighting which can be seen going from the trees on the left to the right to the path.
Here are a couple of examples of my over-exposed and under-exposed images:
| Over-exposed Image |
| Under-exposed Image |
Here is my contact sheet to show my experimenting and investigating through this shoot :
Shooting this photo shoot, I kept on changing my position so that I would have a huge variety of images to show my progression through my shoot and also showing how I investigated with different heights and different angles to succeed and get my final image. I wanted to make sure that through my images you could see quite clearly the shadows protruding onto the path and disappearing into the darkness. This is where it will show my determination to make the image Mid Key and get the best image that I possibly could get. During this shoot, there were many advantages and disadvantages when shooting a photo shoot in a park. One advantage was that there was a good composition of trees on the left hand side where the sun was hitting the trees and this was making the shadows and creating a more interesting image. One disadvantage is that with all the shadows from the trees from the left, there was also other shadows reflecting over some of the shadows that were protruding onto the pathway. Due to this it was slightly annoying because there was no way that I could possibly change this or get rid of them out of my frame. However from this obstacle, I could change this for future planning by noticing the problem at the beginning of the shoot and this wouldn't affect me in the long run.
Here is an example of the other shadows reflecting into the shadows of the trees:
| Shot 14 |
Throughout my whole of my images, I have chosen this image because I find that the composition of this image is very precise and all the shadows that have been protruded from the trees can bee seen heading into the path of darkness. I also chose to have this image as my final image because I have been able to capture the right lighting which was Mid Key lighting and I am very proud to say that I have succeeded photographing with shadows and the way that I have been able to capture the right settings to produce the right Mid Key lighting and still have the colours really complimenting each really well. The settings For my final image were shutter speed 1/ 125, aperture F 14 and ISO 100.
| Final Image |
Thursday, 27 September 2012
First shoot
For my first shoot, I wanted to try and capture soft lighting and the way that I think would be an effective image. For me this would be trying to capture a silhouette of an object or objects when the sun is setting and the colours are all different ranges of oranges and pinks. I like the way that silhouettes create the mystery and warmth in the image because to a photograph, you want to make the viewer seem more interested in your images and make them want to know more. With having the orange and pink colors it really makes the silhouette or silhouettes stand out against the soft lighted background. To make a soft lighting image I had to keep adjusting my settings of my camera every time I took an image until I found the perfect settings. So really for a soft lighting image you would really need a big aperture so that less light can enter through the lens like F 13 and preferably a very quick shutter speed like 1/125 or quicker and 100 ISO.
When I went out taking images for my first shoot, I wanted to capture a simple scene but from the way that I am going to photograph it, it will look more pleasant and not boring. So I chose to capture a simple road, because from the way that the sunlight angle hits the road, it makes the road look more extended and longer than it really is. When I was looking for the perfect road to shoot along I also had to think about the objects or object that I wanted to make silhouetted. So when I came along the road that had great composition and had a couple of objects that could be silhouetted, I was over the moon. The road that I stumbled upon was a simple boring road but it had two great evergreen trees either side about a quarter of the way down the road and this was when I knew that this was the road that I would use for my first final image.
When I started to take my images, I was learning knowledge and discovering new things when each individual image was captured because I knew that from every picture I could improve and get the perfect image. For my first image I took, the shutter speed was 1/80 and my aperture was F 9. I knew that from the output, it was going to be too bright so from then I knew that I had to change my aperture to make the image more darker and make the objects more silhouetted.
Here is my contact sheet for all of my first photo shoot images:
Through my shoot, I was concentrating on getting the composition right in the frame so that it would feel like you was looking square on down the road. I wanted to do this because I had determination to get the best shot that I could possibly create. So when I was taking my images through the amount of time I was shooting, which was about 10-15 minutes because that was how long the sunset stayed at it's most beautiful point, there was many people, cars and cyclists travelling through my location that I was wanting to shoot. With this there was the thought of which prop looked better in the frame than others, so I shot all of the objects that were scanning back and forth in my frame and the best outcome was a traditional London taxi that was coming face on with me and which was turning at the road to go another way. I created a sequence with this taxi because I wanted to try and capture as many images so I could choose my best one from a variety.
Here are a variety of my test shots :
My best image and final image that I had chosen for one my final images, was of the London taxi because from looking at it, the silhouetted trees are very strong and at the right exposure and where about the taxi is right in the middle of the frame makes the image more unique and gives the image a feeling of movement. The way I mean by that is one, the sun is still setting quite fast and the speed of the car moving to the line of the road was relatively fast, so from this moving objects are normally shot in hard lighting, but really they can be shot in soft lighting as well. The settings for my final image are the shutter speed was 1/80t, I left the same, and the aperture F13 .From this I have learnt that by having the shutter speed at the same, it doesn't makes a difference to your image its all about the aperture, and the aperture at F13 it can create the difference between a great picture and a not great image for this I will know for the future how to create unique silhouetted images and that I know which settings to use straight away instead of experimenting with them first.
Overall my first shoot has been very successful, because all my test
shots are very well compromised in the frames and all of them are
coherent. I have also tried to give a great variety of images to choose
from for my first photo shoot because I think that I will be able to
show my progression through how to capture a soft lighting photograph.
When I went out taking images for my first shoot, I wanted to capture a simple scene but from the way that I am going to photograph it, it will look more pleasant and not boring. So I chose to capture a simple road, because from the way that the sunlight angle hits the road, it makes the road look more extended and longer than it really is. When I was looking for the perfect road to shoot along I also had to think about the objects or object that I wanted to make silhouetted. So when I came along the road that had great composition and had a couple of objects that could be silhouetted, I was over the moon. The road that I stumbled upon was a simple boring road but it had two great evergreen trees either side about a quarter of the way down the road and this was when I knew that this was the road that I would use for my first final image.
When I started to take my images, I was learning knowledge and discovering new things when each individual image was captured because I knew that from every picture I could improve and get the perfect image. For my first image I took, the shutter speed was 1/80 and my aperture was F 9. I knew that from the output, it was going to be too bright so from then I knew that I had to change my aperture to make the image more darker and make the objects more silhouetted.
Here is my contact sheet for all of my first photo shoot images:
Through my shoot, I was concentrating on getting the composition right in the frame so that it would feel like you was looking square on down the road. I wanted to do this because I had determination to get the best shot that I could possibly create. So when I was taking my images through the amount of time I was shooting, which was about 10-15 minutes because that was how long the sunset stayed at it's most beautiful point, there was many people, cars and cyclists travelling through my location that I was wanting to shoot. With this there was the thought of which prop looked better in the frame than others, so I shot all of the objects that were scanning back and forth in my frame and the best outcome was a traditional London taxi that was coming face on with me and which was turning at the road to go another way. I created a sequence with this taxi because I wanted to try and capture as many images so I could choose my best one from a variety.
| Test Shot 5 |
| Test Shot 1 |
| Test Shot 14 |
My best image and final image that I had chosen for one my final images, was of the London taxi because from looking at it, the silhouetted trees are very strong and at the right exposure and where about the taxi is right in the middle of the frame makes the image more unique and gives the image a feeling of movement. The way I mean by that is one, the sun is still setting quite fast and the speed of the car moving to the line of the road was relatively fast, so from this moving objects are normally shot in hard lighting, but really they can be shot in soft lighting as well. The settings for my final image are the shutter speed was 1/80t, I left the same, and the aperture F13 .From this I have learnt that by having the shutter speed at the same, it doesn't makes a difference to your image its all about the aperture, and the aperture at F13 it can create the difference between a great picture and a not great image for this I will know for the future how to create unique silhouetted images and that I know which settings to use straight away instead of experimenting with them first.
| Final Image |
Reflectors
Using Reflectors For Portraits
When using a reflector in portraits, the reflector will bounce the light from the reflector onto the model and this will give you an instant result every single time you take an image, unlike a flash or external flash. Reflectors are used when there is complete shadow on any of the models main features that is being focused on, and this is mainly their eyes, nose and chin, so when the light hits the reflector and hits the model, the shadows will then open up and allow light to shine onto the models face and make the image more eye-catching.
Using reflectors are an advantage in photography because it creates a flash like effect but not as harsh and bright towards the object or objects that are being photographed. They are also a great tool for making your object or model, more eye-catching in the most natural way possible because the image will give off a very soft and warm feeling effect. Different reflectors give off different effects, such as the silver reflector gives of a more harsh and brighter effect, whereas a white reflector will give off a natural effect and not as bright.
For my class exercise we got put into groups of five and I was put with Natalie, Neil, Faye and Charlie and we had to find somewhere that would give a great location for examples when using reflectors. We had a set up of two of us had to hold the reflector to hold it steady, two of us photographing our model and one of us being the model. When it was my turn to photograph the examples, Natalie was my model and I had her standing in the same composition, so that all my examples would show the effect of the reflectors that I am am trying to show.
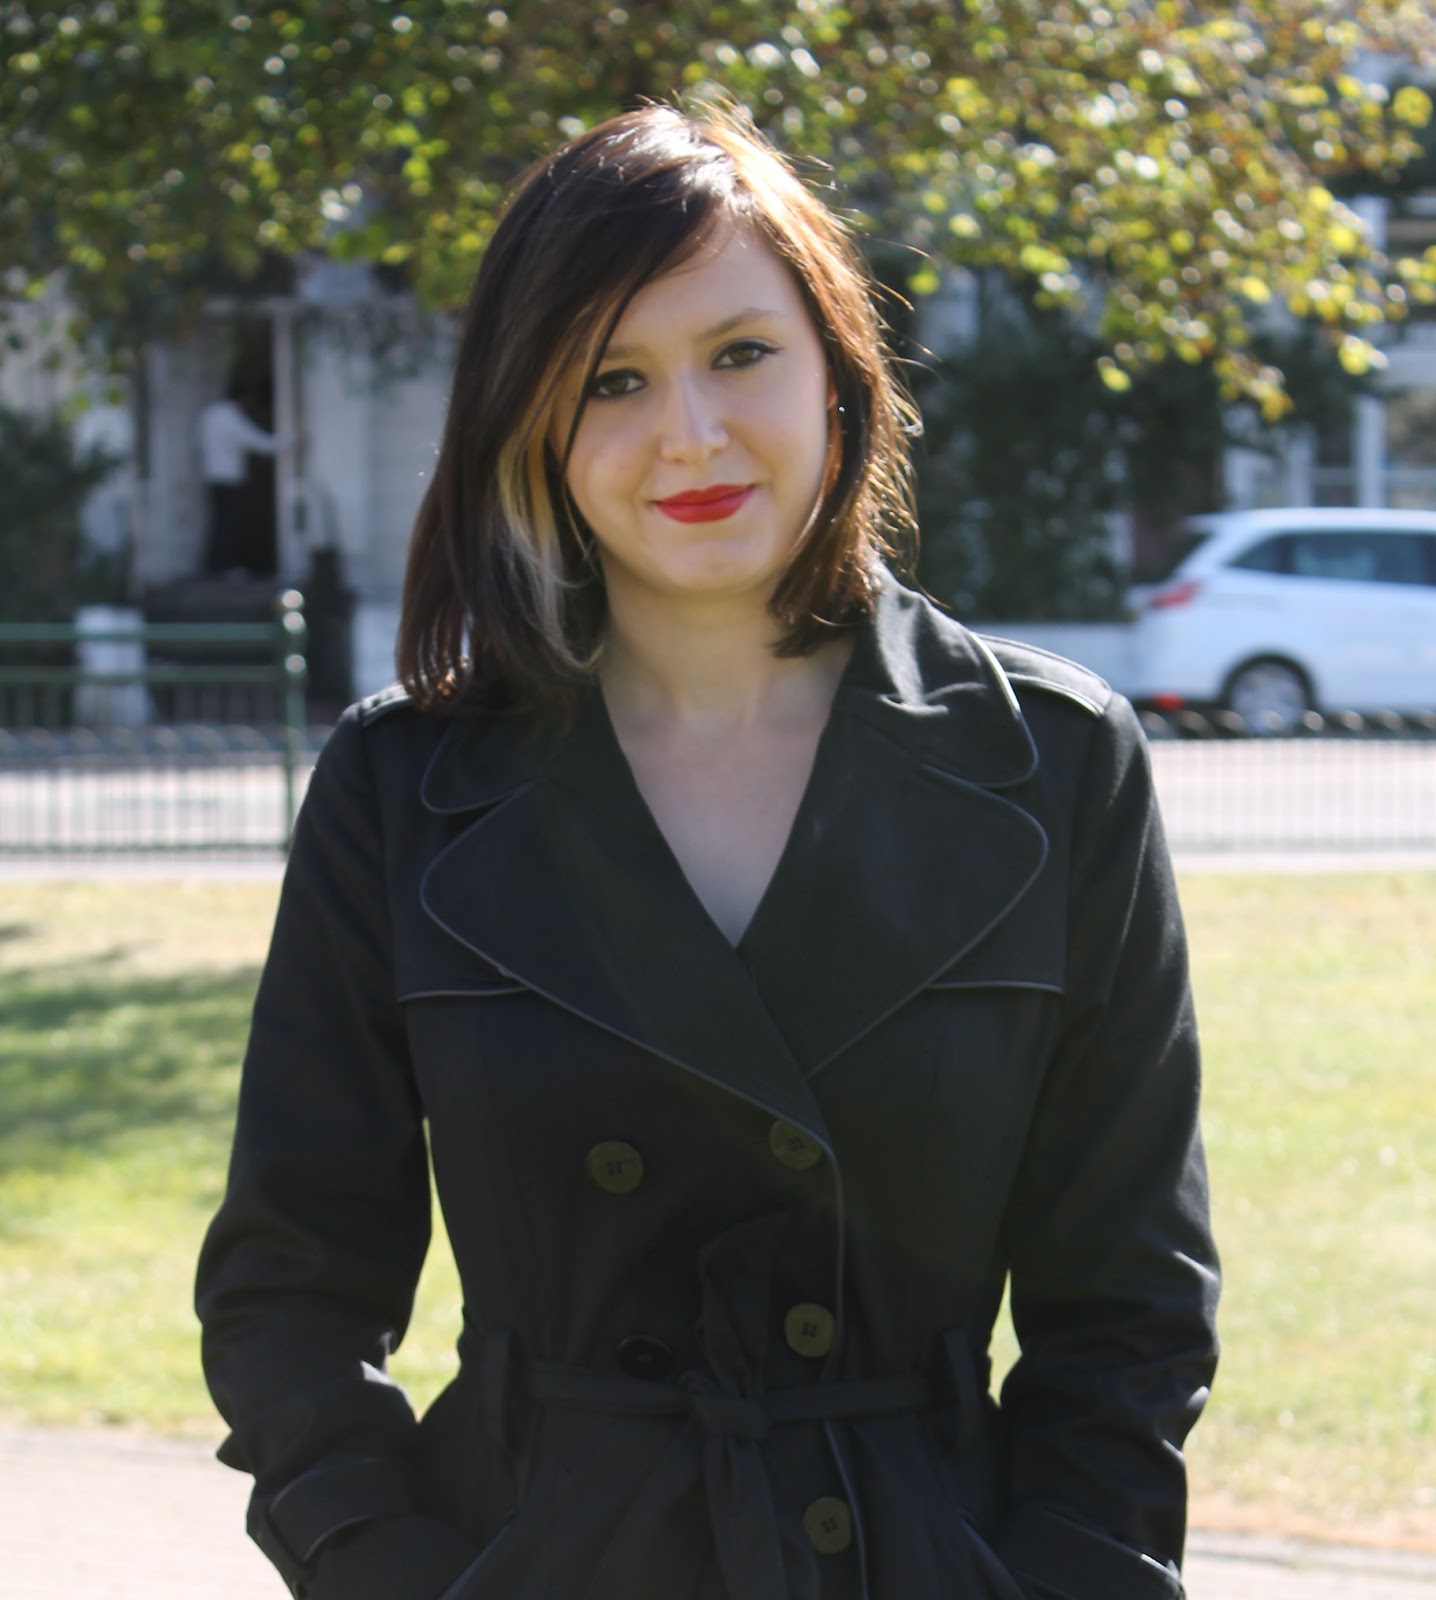
The way that the white reflector effects Natalie is that it makes her face look more neutral and natural.
The way that the silver reflector effects Natalie is that it makes her stand out more to the viewer by how bold the glow of the reflector makes her.
The way that working without a reflector really shows Natalie's shadowed face and none of her features are bold and vibrant like you can see when I used the silver and white reflectors.
Here are my three examples of reflectors. These images show examples of a silver and white reflector and without a reflector:
![]() |
| Silver Reflector |
![]() |
| White Reflector |
![]() |
| Without Reflector |
Wednesday, 26 September 2012
Illuminance
This week I was given my second assignment since I have started college and it is called 'Illuminance'. At first I personally didn't understand what this word "illuminance' meant but as we went more in depth about the brief I got more understanding about what it meant and what this subject was about. For this project we had to experiment photographing with light and the way that other objects give off light to show another object and the way that I could be creative with light myself. We could either shoot in digital or film, but I personally chose digital, because I wanted to show off my skills with digital usage and experiment around with my Canon 1100D more and from my outcomes I will be able to know my strengths and weaknesses when photographing light.
In the final outcome of this project I will have to present on my blog three final photographs that show three different ways that I have experimented around with different lighting's. The way that I mean different lighting's, is that there are different categories when photographing with light, and if I didn't know about the categories, I wouldn't have such a professionally eye for my images and other images other photographers work that I have researched. I thought that it would be good to research different photographer's work because this would give me inspiration for my images that I would of been creating.
In our first lesson that we had for our project, my tutor was explaining some techniques on how to do different lighting.Two of the lighting techniques that my tutor had taught me was Hard and Soft Lighting.
Hard Lighting
Hard lighting is a technique that makes the object that is being photographed more vibrant and more eye opening to when viewing the image. Hard lighting mainly produces fine-lined shadows from a single light source, which is mainly the sun in most cases, because of the natural brightness, but can also be used in the studio photographing department. When trying to take a hard photographed image, you have to make sure that there is a lot of depth of field in the image is very strong and that the only thing that catches your eye is the object that is being photographed.
Good examples of photography that mostly uses hard lighting is shooting portraiture and a photographer who I can proudly show his great hard lighting techniques is Martin Schoeller. Schoeller is a New York based photographer who's style is distinguished by similar treatments of all subjects, whether they are celebrities or not. His most recognisable portraits are just head shots of some well known celebrities, such as Barrack Obama, Jay Z and Daniel Radcliffe. His work is easy to recognise because the way that all of his images have the same lighting, backdrop and tone to really make his portraits individual and detectable that they are his work. The great thing about Schoeller's work is that all his images shows off every person's imperfections so that they don't look whatsoever attractive, like they do on the television or in in magazines.
Here are a couple of examples of Martin Schoeller's portraits:
Soft Lighting
Soft lighting is a totally different style compared to hard lighting because instead of making the image look hard and crisp, like hard lighting does, it makes the image more warm and softer in colours and not so vibrant . The good things about soft lighting is that the warm soft light tends to curl comfortably around the object that is being positioned in front of the light and it seems to cast shadows with soft, not shark edges around the object. Another good thing is that the closer the light source is to the object, this is mainly in a studio room, the softer the light will be curling around that object. The last thing that is good about soft lighting is that soft light makes the object look more beautiful or younger. This makes the image look more pleasant to look at, due to the great skin texture and flawless tones on the object, and these sorts of images are good for modelling photographs a great picture to have in fashion magazines. Soft lighting can be as well taken outside for landscape photography, and all the light source is is the sun when the sun is setting and the warm colours of the sunset appear.
A great photographer who photographs soft light very well is Julia Margaret Cameron. Cameron is a British photographer who creates the most amazing soft lighting portraits that you would ever see. This is due to the amazing tone and texture that really shows up on the model's faces and bodies. She was most successful by capturing portraits by Charles Darwin and Robert Browning, but her most distinctive portraits are the ones where the portraits are cropped closely around the subject's face. The good thing about Cameron's portraits is that when she was taking the soft lighting portraits, she made the soft lighting different so that there was a varied amounts of portraits that were beautiful but photographed differently with different styles. I mean by this by all her portraits have different amounts of shadowing, because if there was a lot of shadowing on the person's face, that meant that the light was very close to the subject, but if there was hardly any shadowing, this meant that the light source was far away.
Here are a couple of examples of Julia Margaret Cameron's images:
My tutor also taught us some different ways of how to make an image look good over and under exposed, and these are called High and Low key lighting.
High Key and Low Key Lighting
High Key lighting is a style of lighting that makes the whole image look very over-exposed, this means by making the image brighter than normal so that hardly any shadow was presence during the capturing of the image. When viewing an High Key image, they give across mainly happiness and a calm soft feeling as if there wasn't a bad thing in the world. The great way that High Key lighting can be great inside of a studio and outside of a studio, is amazing because if you wanted to create such a high lighted image outside you would have to over-expose it. From over-exposing the image, you would have to change you settings by increasing the aperture another two F stops to make the image the right setting.
Low Key lighting is a style of lighting that makes the whole image look very under-exposed. This lighting technique is the complete opposite to High Key lighting, but all you have to do is under-expose the image by decreasing the aperture by two F stops. By under-exposing, this means that there hasn't been enough light entering the lens to capture enough light onto the image when being taken. When you view a Low Key image, it makes the viewer feel as if there is some gloomy mystery behind the image and this is because the majority of the image is dark. I think that Low key lighting is great for doing mysterious night photography and mysterious portraits that have a very strong meaning behind them.
Here is an example of each High and Low Key lightings:
My last style of lighting that I got taught was the way in between High and Low Key, there is a lighting style which combines the both together to make an even lighted image and this style is called Mid Key.
Mid Key
Mid Key is a lighting style that shows the in between stage of High and Low key. The way that I mean by that is by having the darkness and the brightness level and that makes the image more even. The best genre when taking pictures using a Mid Key lighting is by making sure that your image outcome is going to have a very strong meaning because there will be a lot of power in the image to back up the meaning. The feeling in a Mid Key image is that it will be in the middle of both High and Low key, so due to this the outcome will have to bring across a strong meaning that shows both sides. Mid Key can be used for both inside photography and outside photography because wherever you use it, it will always be suitable for absolutely any object.
Here is an example of a Mid Key Lighting image:


In the final outcome of this project I will have to present on my blog three final photographs that show three different ways that I have experimented around with different lighting's. The way that I mean different lighting's, is that there are different categories when photographing with light, and if I didn't know about the categories, I wouldn't have such a professionally eye for my images and other images other photographers work that I have researched. I thought that it would be good to research different photographer's work because this would give me inspiration for my images that I would of been creating.
In our first lesson that we had for our project, my tutor was explaining some techniques on how to do different lighting.Two of the lighting techniques that my tutor had taught me was Hard and Soft Lighting.
Hard Lighting
Hard lighting is a technique that makes the object that is being photographed more vibrant and more eye opening to when viewing the image. Hard lighting mainly produces fine-lined shadows from a single light source, which is mainly the sun in most cases, because of the natural brightness, but can also be used in the studio photographing department. When trying to take a hard photographed image, you have to make sure that there is a lot of depth of field in the image is very strong and that the only thing that catches your eye is the object that is being photographed.
Good examples of photography that mostly uses hard lighting is shooting portraiture and a photographer who I can proudly show his great hard lighting techniques is Martin Schoeller. Schoeller is a New York based photographer who's style is distinguished by similar treatments of all subjects, whether they are celebrities or not. His most recognisable portraits are just head shots of some well known celebrities, such as Barrack Obama, Jay Z and Daniel Radcliffe. His work is easy to recognise because the way that all of his images have the same lighting, backdrop and tone to really make his portraits individual and detectable that they are his work. The great thing about Schoeller's work is that all his images shows off every person's imperfections so that they don't look whatsoever attractive, like they do on the television or in in magazines.
Here are a couple of examples of Martin Schoeller's portraits:
![]() |
| Jay Z |
![]() |
| Brad Pitt |
| Paris Hilton |
Soft lighting is a totally different style compared to hard lighting because instead of making the image look hard and crisp, like hard lighting does, it makes the image more warm and softer in colours and not so vibrant . The good things about soft lighting is that the warm soft light tends to curl comfortably around the object that is being positioned in front of the light and it seems to cast shadows with soft, not shark edges around the object. Another good thing is that the closer the light source is to the object, this is mainly in a studio room, the softer the light will be curling around that object. The last thing that is good about soft lighting is that soft light makes the object look more beautiful or younger. This makes the image look more pleasant to look at, due to the great skin texture and flawless tones on the object, and these sorts of images are good for modelling photographs a great picture to have in fashion magazines. Soft lighting can be as well taken outside for landscape photography, and all the light source is is the sun when the sun is setting and the warm colours of the sunset appear.
A great photographer who photographs soft light very well is Julia Margaret Cameron. Cameron is a British photographer who creates the most amazing soft lighting portraits that you would ever see. This is due to the amazing tone and texture that really shows up on the model's faces and bodies. She was most successful by capturing portraits by Charles Darwin and Robert Browning, but her most distinctive portraits are the ones where the portraits are cropped closely around the subject's face. The good thing about Cameron's portraits is that when she was taking the soft lighting portraits, she made the soft lighting different so that there was a varied amounts of portraits that were beautiful but photographed differently with different styles. I mean by this by all her portraits have different amounts of shadowing, because if there was a lot of shadowing on the person's face, that meant that the light was very close to the subject, but if there was hardly any shadowing, this meant that the light source was far away.
Here are a couple of examples of Julia Margaret Cameron's images:
![]() |
| Charles Hay Cameron (Husband) |
![]() |
| Julia Prinsep Jackson (Cameron's niece) |
![]() |
| "Sadness" |
My tutor also taught us some different ways of how to make an image look good over and under exposed, and these are called High and Low key lighting.
High Key and Low Key Lighting
High Key lighting is a style of lighting that makes the whole image look very over-exposed, this means by making the image brighter than normal so that hardly any shadow was presence during the capturing of the image. When viewing an High Key image, they give across mainly happiness and a calm soft feeling as if there wasn't a bad thing in the world. The great way that High Key lighting can be great inside of a studio and outside of a studio, is amazing because if you wanted to create such a high lighted image outside you would have to over-expose it. From over-exposing the image, you would have to change you settings by increasing the aperture another two F stops to make the image the right setting.
Low Key lighting is a style of lighting that makes the whole image look very under-exposed. This lighting technique is the complete opposite to High Key lighting, but all you have to do is under-expose the image by decreasing the aperture by two F stops. By under-exposing, this means that there hasn't been enough light entering the lens to capture enough light onto the image when being taken. When you view a Low Key image, it makes the viewer feel as if there is some gloomy mystery behind the image and this is because the majority of the image is dark. I think that Low key lighting is great for doing mysterious night photography and mysterious portraits that have a very strong meaning behind them.
Here is an example of each High and Low Key lightings:
![]() |
| Low Key Lighting |
![]() |
| High Key Lighting |
My last style of lighting that I got taught was the way in between High and Low Key, there is a lighting style which combines the both together to make an even lighted image and this style is called Mid Key.
Mid Key
Mid Key is a lighting style that shows the in between stage of High and Low key. The way that I mean by that is by having the darkness and the brightness level and that makes the image more even. The best genre when taking pictures using a Mid Key lighting is by making sure that your image outcome is going to have a very strong meaning because there will be a lot of power in the image to back up the meaning. The feeling in a Mid Key image is that it will be in the middle of both High and Low key, so due to this the outcome will have to bring across a strong meaning that shows both sides. Mid Key can be used for both inside photography and outside photography because wherever you use it, it will always be suitable for absolutely any object.
Here is an example of a Mid Key Lighting image:


Subscribe to:
Posts (Atom)